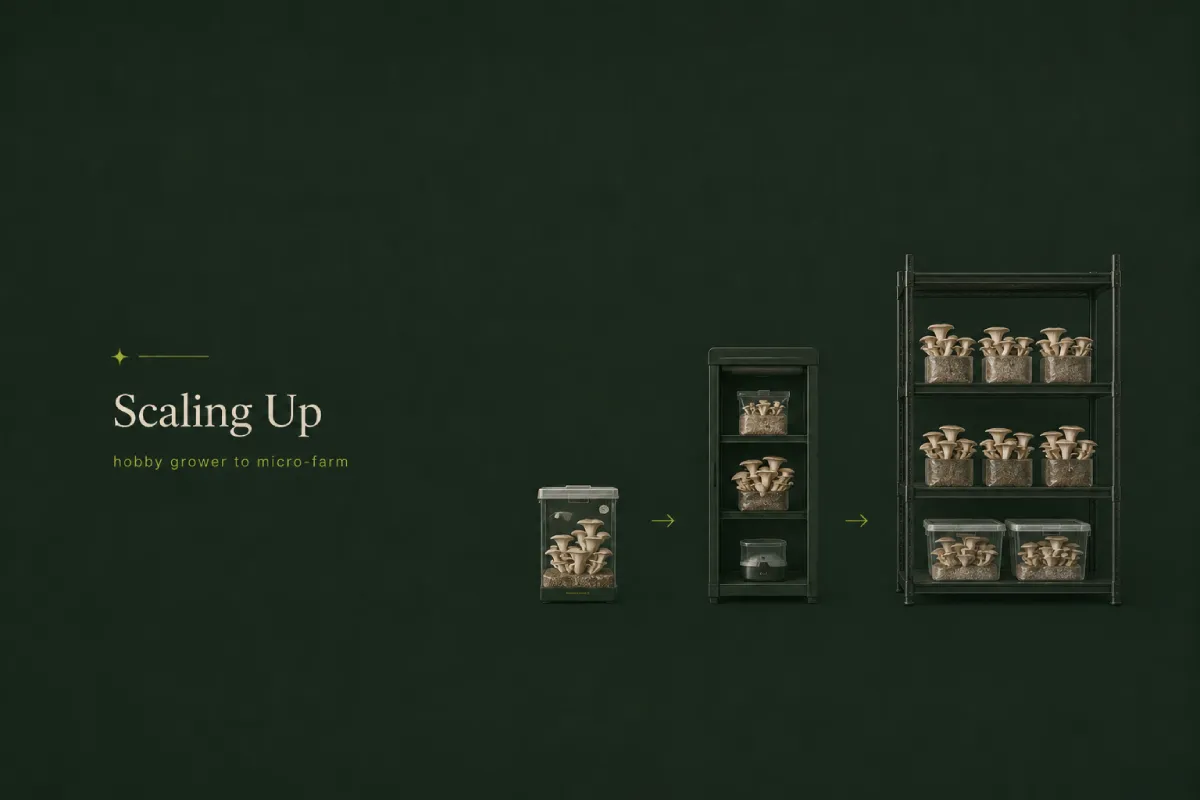
Scaling mushroom cultivation from a weekend hobby to a functioning micro-farm follows a clear, predictable progression through three stages — beginner, intermediate, and micro-farm — each requiring different equipment, time investment, and spawn economics. Understanding where you are right now and what the next stage looks like makes every investment decision obvious rather than overwhelming. Growers who work with Foxfire Mushrooms in Longmont, Colorado move through these stages regularly, and the progression is more accessible than most people expect: you can go from first grow kit to 20+ lbs per week within 6–12 months of focused learning and modest reinvestment.
There’s a recognizable inflection point in mushroom cultivation. You start with a grow kit — maybe on a whim, maybe because a friend turned you on to fresh Lion’s Mane — and you get a flush that actually works. Then you do it again. Then you buy a second kit. Then a third. Somewhere in there, you realize you’re giving mushrooms to neighbors, bringing bags to family dinners, and wondering whether you could sell some at the Saturday market.
That’s the inflection point. The question isn’t whether you can scale — you absolutely can — it’s about understanding the jump from stage to stage before you spend money on equipment you’re not ready to use or skip steps that would make your operation significantly more efficient.
This guide gives you a complete map: what each stage looks like, what it costs to run, what you can produce, and what the revenue opportunity looks like in the Colorado market.
Compared to almost any other small-scale agricultural enterprise, mushroom cultivation has a remarkable combination of characteristics that make scaling practical:
Time commitment: 2–4 hours per week
Yield: 1–5 lbs fresh mushrooms per week
Revenue potential: Personal use, gifts, farmers market trial
At Stage 1, you’re using fully colonized products — grow kits or pre-colonized grain spawn bags from Foxfire Mushrooms — and fruiting them in a basic setup. There’s no sterilization involved. You don’t need a pressure cooker. You’re learning the fundamentals: what healthy mycelium looks like, how to manage humidity and FAE in your fruiting chamber, when to harvest, and how to interpret what your mushrooms are telling you.
Equipment at Stage 1:
Spawn economics at Stage 1: Foxfire’s colonized grain spawn takes the guesswork out of inoculation. You’re paying a modest premium per bag compared to doing everything yourself, but you’re buying time, reliability, and education. At 1–5 blocks per week, this is the right trade.
Learning goals for Stage 1:
Read our beginner’s guide to growing mushrooms if you haven’t already — it covers the fundamentals you’ll need before moving forward.
Time commitment: 8–15 hours per week
Yield: 10–40 lbs fresh mushrooms per week
Revenue potential: $200–800/week (farmers markets at $8–15/lb oyster, $12–20/lb Lion’s Mane)
At Stage 2, you’ve outgrown the hobby frame and you’re thinking in production terms. You’re buying bulk colonized spawn, running multiple fruiting environments, and starting to make decisions about whether to begin sterilizing your own substrate.
Equipment additions at Stage 2:
The pressure cooker threshold: Starting to sterilize your own grain is the most significant capability jump in Stage 2. A 23-quart pressure cooker sterilizes 4–6 quart jars of grain or 2–3 large substrate bags per cycle at 15 PSI for 2.5–3 hours. Once you’re doing this, your per-block cost drops significantly — you’re buying raw grain (oats or rye at $0.50–1.00/lb in bulk) and sterilizing it yourself rather than buying pre-sterilized bags. The per-block materials cost can drop from $8–12 to $2–4.
Spawn economics at Stage 2: A mix makes sense here. Continue using Foxfire colonized spawn for established blocks while you develop your own inoculation skills on the side. As your success rate improves, shift more production to self-made blocks. Foxfire’s liquid culture syringes give you a fast, reliable inoculation tool for your home-sterilized grain.
Separation of zones: By Stage 2, you want to think in three distinct areas — even if they’re just three corners of the same basement:
Time commitment: 20–40 hours per week
Yield: 50–200+ lbs fresh mushrooms per week
Revenue potential: $1,000–4,000/week at farmers markets or on restaurant accounts
Stage 3 is a business. You’re producing all your own spawn in-house, running dedicated rooms for each production zone, tracking every batch, and thinking about market relationships, not just cultivation techniques. This is where mushroom farming becomes a viable small business or serious supplementary income.
Equipment additions at Stage 3:
Spawn multiplication at Stage 3: One colonized grain jar or bag inoculates 5–10 new jars via grain-to-grain transfer. This means one high-quality liquid culture syringe, used to start 5 jars, can eventually produce hundreds of production blocks in a multiplication cascade. Understanding this math is how micro-farms control their spawn costs.
Colorado business context: The Front Range mushroom market is genuinely strong. Boulder County Farmers Markets, the Fort Collins Old Town Square market, Denver’s Cherry Creek and South Pearl Street markets — these venues see consistent, enthusiastic demand for locally grown specialty mushrooms. Restaurant relationships with farm-to-table establishments in the Boulder-Denver corridor can provide predictable weekly volume commitments.
| Feature | Sterilized Grain | Colonized Grain |
| 1 — Beginner | 1–5 | 2–4 hrs |
| 2 — Intermediate | 5–20 | 8–15 hrs |
| 3 — Micro-Farm | 20–100+ | 20–40 hrs |
Understanding your costs at each stage is what separates growers who scale successfully from those who burn out frustrated.
Per-block cost breakdown:
| Cost Component | Stage 1 | Stage 2 | Stage 3 |
| Spawn (per block) | $8–12 (pre-colonized) | $4–8 (mix) | $0.50–1.50 (in-house) |
| Substrate materials | $2–4 | $1.50–3 | $1–2 |
| Labor (per block) | 10–15 min | 20–30 min | 12–20 min |
| Equipment amortized | Minimal | $0.25–0.50 | $0.50–1.00 |
| Total per block | ~$12–18 | ~$6–12 | ~$3–6 |
Revenue per block:
A healthy 5-lb substrate block yields 1–2 lbs of fresh mushrooms across multiple flushes (blue oyster and pink oyster tend toward the higher end; Lion’s Mane and King Oyster toward the lower end for total yield). At farmers market prices:
A single block producing 1.5 lbs generates $12–30 in gross revenue, against a Stage 2 cost of $6–12. That’s a 2–3x return per block before labor. At Stage 3 economics, the margins expand significantly.
Break-even analysis: A Stage 2 operation running 10 blocks/week needs to sell approximately 5–7 lbs per week to cover all costs (including equipment amortization). At $10/lb average, that’s $50–70/week break-even against a potential $100–300/week gross. The numbers work — the constraint is usually market access and consistency of production, not the economics themselves.
Stage 1: Your kitchen counter or a closet shelf is sufficient. A SGFC fits on any flat surface. You need no dedicated space.
Stage 2: A dedicated corner of a basement or a spare room is ideal. Colorado’s basements run 55–65°F in winter — perfect for cold-fruiting species like Blue Oyster and King Oyster — but you’ll need supplemental heat in the colonization zone to keep grain jars at 70–78°F. In summer, Colorado’s high altitude and low humidity make basement environments relatively stable, though you may still need a window AC unit in your fruiting room to keep temperatures below 75°F.
Stage 3: Think in rooms, not corners. A 3-room setup — inoculation/clean room, colonization room, fruiting room — is the gold standard. Even a small garage converted with basic insulation and climate control (mini-split AC/heat = $800–1,500 installed) can serve as a complete micro-farm facility.
Colorado has a vibrant local food culture and a favorable environment for small-scale specialty produce. A few channels worth understanding:
Farmers markets: Boulder County Farmers Markets (including the Pearl Street and East Boulder locations), the Fort Collins Old Town Square Farmers Market, and Denver’s Cherry Creek and City Park markets all see steady demand for specialty mushrooms. Booth fees range from $25–100/day depending on market and season. Packaging matters — clear clamshells or brown kraft bags with simple branded labels read as premium.
Restaurant accounts: Chef relationships are the most reliable revenue channel for volume producers. Approach with a sample bag, a one-page menu of available species and typical weekly volumes, and pricing at 20–30% below retail (chefs expect a wholesale discount). Start with 2–3 restaurants and build reliability before expanding.
CSA boxes and direct-to-consumer: Selling weekly mushroom subscription boxes directly to consumers is increasingly viable in Colorado’s food-forward communities. Lower logistics complexity than restaurant accounts; premium pricing potential.
Online sales: Dried mushrooms, mushroom powders, and liquid cultures have favorable shipping characteristics. Colorado’s e-commerce-friendly culture and the national specialty mushroom market make direct-to-consumer online channels worth exploring at Stage 3.
Licensing and regulations: Selling mushrooms in Colorado requires navigating food safety regulations that vary by channel and volume. Colorado’s cottage food laws have specific parameters; farmers market sales, restaurant supply, and online commerce each have different requirements. We recommend verifying current requirements directly with the Colorado Department of Agriculture before selling. The specific requirements change, and getting current, accurate information from the source is important.
At Stage 1, you can keep notes in a notebook. By Stage 2, tracking becomes genuinely valuable for improving your operation. By Stage 3, it’s essential.
Minimum batch tracking fields:
A simple spreadsheet handles this perfectly. Over time, you’ll identify which substrates produce the best yields for each species, which batches had contamination problems and why, and how your flush 2 and flush 3 yields compare to flush 1 (useful for deciding when to retire a block).
Tracking also helps you understand your colonization times across your specific conditions — basement temperature, ambient humidity, and your specific substrates will produce slightly different timing than published averages.
Equipment upgrades should be driven by specific bottlenecks, not by gear enthusiasm. Three clear upgrade triggers:
Contamination rate above 5%: If more than 1 in 20 blocks is getting contaminated, your inoculation environment needs an upgrade — typically from a still air box to a flow hood. A contamination rate above 5% kills your economics. See our contamination prevention guide for diagnostic steps before spending on equipment.
Yield per block declining: If your average yield per block trends down over several months, this usually points to spawn quality issues (old or degraded liquid culture stock), substrate nutrition imbalance, or fruiting environment problems. Address the root cause before adding more blocks.
Time becoming the bottleneck: When you find yourself turning down blocks because you don’t have time to process them, it’s time to systematize. This usually means investing in faster sterilization (larger pressure cooker or autoclave), automation in the fruiting room, or batch inoculation systems that process more bags per session.
Whether you’re getting serious about your first production setup or ready to move from Martha tents to a dedicated grow room, Foxfire Mushrooms has the supplies to grow with you.
Foxfire Mushrooms — 426 Crystal Place, Longmont, Colorado 80504. All spawn and supplies backed by our 30-day guarantee.
At Stage 2 (5–20 blocks/week), realistic gross revenue is $200–800/week at farmers market prices. At Stage 3 (20–100+ blocks/week) with restaurant accounts and market sales, $1,000–4,000/week is achievable. Net income depends on your costs, labor, and how efficiently you’ve built your operation. These numbers are realistic but not guaranteed — they require consistent production quality and active market development.
A dedicated space of roughly 150–250 square feet, split between colonization and fruiting zones, can produce 20 lbs/week comfortably. A large walk-in closet for colonization plus a 2×4 grow tent for fruiting gets you there at Stage 2. The space requirement scales more slowly than the production volume as you get more efficient.
For fresh mushrooms sold directly at farmers markets, a commercial kitchen is typically not required under Colorado’s cottage food provisions, but specific requirements depend on how you’re selling and where. For restaurant supply, the requirements are different. Verify current Colorado Department of Agriculture requirements before starting to sell — regulations are subject to change and the specifics matter.
Blue Oyster and Pink Oyster are the most accessible to grow and sell well due to their visual appeal. Lion’s Mane commands premium pricing ($15–20/lb) and generates high customer curiosity. Shiitake has broad consumer recognition and steady demand. Starting with two or three reliable species is better than spreading thin across many.
Most growers reach Stage 2 production within 3–6 months of starting seriously. Reaching Stage 3 (micro-farm level) typically takes 9–18 months of active reinvestment and learning. The constraint is usually skill development and market building, not capital — the equipment requirements at each stage are modest.
Yes, when approached systematically. The per-block economics are favorable at Stage 2 and become compelling at Stage 3 as spawn costs drop with in-house production. The real risks are contamination (which discipline and good technique largely control), market access (which requires active relationship-building), and consistency of production (which improves dramatically with tracking and process discipline).
Share this article
Grab a beginner-friendly kit and apply what you just read —
or take the quiz and we’ll match you to the right
starting point.
