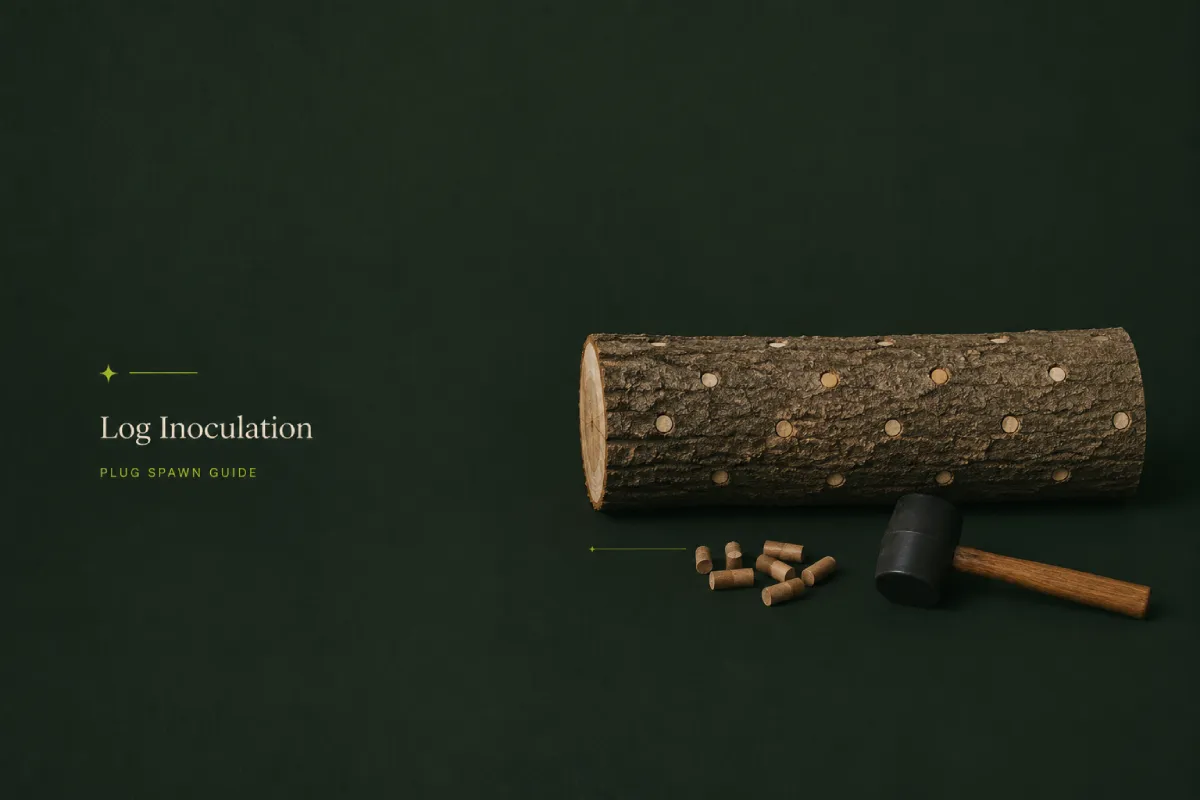
Log inoculation with plug spawn is the process of drilling holes into freshly cut hardwood logs, inserting colonized wooden dowels — called plug spawn — sealing them with wax, and allowing mushroom mycelium to spread through the wood. The result: a living, self-renewing fruiting body that produces flushes of gourmet mushrooms outdoors for three to seven years, depending on the species and log size. No pressure cooker, no sterilized bags, no climate-controlled grow room required. Just a drill, a mallet, some wax, and a shaded spot in your yard.
This method is fundamentally different from indoor cultivation. Where indoor growing on grain or sawdust substrate demands sterile technique, controlled temperatures, and continuous attention, log growing mirrors the way mushrooms actually live in nature — slowly colonizing wood, fruiting seasonally, and returning year after year. In Colorado, that means Shiitake logs fruiting under a deck in Boulder, Lion’s Mane emerging from a shaded pile in Fort Collins, and Oyster mushrooms appearing on a north-facing log rack in Longmont every spring. It’s the lowest-maintenance, highest-reward mushroom cultivation method we know of.
At Foxfire Mushrooms, we carry plug spawn in six species — Shiitake, Wine Cap, Blue Oyster, Lion’s Mane, Reishi, and Chicken of the Woods — all available in 100-count bags from our shop. One bag is enough to inoculate two to three standard 4-foot logs. This guide will walk you through every step of the process, with specific advice for Colorado’s climate, wood availability, and seasonal timing. If you’re new to mushroom cultivation entirely, start with our beginner’s guide to growing mushrooms before diving in here.
Log cultivation is the traditional method — the one that predates laboratory substrate formulas by centuries. And for good reason. Here’s why we still love it and why we recommend it to growers at every level.
The single most important decision in log cultivation is matching the right mushroom species to the right wood species. Every mushroom has evolved to thrive in specific types of wood — the enzymes its mycelium produces are calibrated for particular lignin and cellulose structures. Use the wrong wood and colonization will be slow, patchy, or fail entirely.
| Mushroom | Best Log Wood | Good Alternatives | Avoid |
|---|---|---|---|
| Shiitake | Oak, Maple | Alder, Sweetgum | All conifers |
| Blue Oyster | Oak, Alder, Cottonwood | Maple, Willow | All conifers |
| Lion’s Mane | Beech, Maple | Oak | All conifers |
| Reishi | Oak, Cherry, Maple | Alder | All conifers |
| Chicken of the Woods | Oak, Cherry | Locust | All conifers — never |
| Wine Cap | N/A — wood chips/garden beds, not logs | — | N/A |
Note on Wine Cap: Wine Cap (Stropharia rugosoannulata) is a wood chip and garden bed species, not a log species. We carry Wine Cap plug spawn, but it’s inoculated into wood chip mulch in garden beds rather than solid logs. See our dedicated Wine Cap mushroom garden bed guide for that process.
Gambel oak (Quercus gambelii) — the scrubby, multi-stemmed oak native to Colorado’s foothills — is an excellent Shiitake host. It’s common throughout Boulder County, Jefferson County, and the El Paso County foothills, and local arborists and tree services frequently have fresh-cut Gambel oak available for free or very cheaply. When calling around, specify that you need hardwood (not pine or spruce), freshly cut within the last 4–6 weeks, and logs in the 3–6″ diameter range. Our seasonal mushroom guide for Colorado has more on local wood species and timing.
One of the best things about log inoculation is how minimal the supply list is. No laminar flow hood, no agar, no stir plates.
| Supply | Notes | Where to Get |
|---|---|---|
| Plug spawn, 100-count bag | Foxfire — choose your species | Foxfire |
| Cordless drill | Any standard drill works fine | Hardware store |
| 5/16″ drill bit | Must be exactly 5/16″ — the standard fit for plug spawn | Hardware store |
| Mallet or hammer | To tap plugs flush with the bark surface | Hardware store or any toolbox |
| Cheese wax or beeswax | Seals plugs against contamination; must be melted | Foxfire or homebrew supply |
| Small brush or dauber | For applying melted wax | Craft store |
| Camp stove or double boiler | For melting wax outdoors or in kitchen | Kitchen or camping gear |
| Labels (tape + marker) | Mark species and inoculation date on every log | Any office supply |
| Gloves | Especially useful during waxing — hot wax drips | Any |
Not on the list: sterilizer, still air box, glove box, latex gloves for spawn work, or any special clothing. Log inoculation is genuinely low-tech.
Read our plug spawn buying guide if you’re deciding between species or want a deeper breakdown of what to look for in quality plug spawn before you order.
This is the complete plug spawn log inoculation guide — every step in order, with the specifics that actually matter for success.
Source freshly cut hardwood logs in your target diameter (3–6″) and cut them to 3–4 foot sections if they haven’t been pre-cut. If logs were freshly felled, allow them to rest for 4–8 weeks before inoculating. This rest period serves a critical purpose: it allows the natural antimicrobial compounds in freshly cut wood — compounds the living tree produced to fight fungal invasion — to break down, making the wood hospitable to your spawn. At the same time, the cut ends begin sealing slightly, and competing surface molds that don’t survive well in the wood’s interior start dying off.
Before inoculating, do a freshness check: the log ends should still feel moist when you press your finger to them. If they feel completely dry or the wood has started to crack and check significantly, the log may be too dry for good colonization. Heavily cracked logs can still work, but expect slower, patchier results.
Unlike grain spawn inoculation, log inoculation doesn’t require a sterile environment. Working outdoors on a picnic table, tailgate, or sawhorses is completely appropriate. The wood itself provides enough resistance to contamination during the process.
Set up everything before you start drilling:
Pro tip: If you have a second person available, work as a team — one person drilling holes, the other immediately inserting plugs and waxing behind them. This keeps each exposed hole open for the minimum possible time and dramatically speeds up the process. Two people can inoculate a log in under 10 minutes once they get into rhythm.
Work one hole at a time — drill a hole, insert the plug, wax it, then move to the next. Don’t drill all your holes first and then go back to insert plugs. Every open, unsealed hole is an entry point for contamination and a moisture loss point, and in Colorado’s dry air, an unsealed hole can dry out noticeably in less than an hour.
To insert: place the plug against the hole and tap it firmly with your mallet or hammer. The plug should seat flush with the log surface or very slightly below it — not proud of the surface, not hammered so deep it disappears below the hole. A flush plug leaves no gap for contaminants or competing organisms.
Be firm but controlled. You’re tapping solid wood into solid wood — it takes a real strike, but you’re not trying to drive a nail. If you hear the wood cracking around the hole, ease up.
Immediately after inserting each plug, brush on melted wax. This step is non-negotiable — wax is the barrier that keeps contamination out during the entire colonization period, which can run from 6 to 24 months depending on species.
Apply wax generously. The wax should:
Don’t be stingy. A thin, incomplete wax seal is the most common reason log inoculations fail. The wax costs almost nothing and the spawn cost real money — use enough wax.
In Colorado’s dry air, wax cools and hardens within seconds. Check each sealed plug after it hardens: if you can see any uncovered plug wood through the wax, apply a second coat.
Optional but recommended: Wax the cut ends of your logs as well. The end grain is the most porous part of the log and loses moisture fastest. Sealing the ends slows moisture loss during the long colonization period, which is especially important in Colorado’s low-humidity climate.
Label every log before you move it. Write directly on the bark with a paint marker, or attach a waterproof label with species and inoculation date. You may have six species going at once across a dozen logs, and Shiitake and Lion’s Mane logs look identical until they fruit. Don’t trust your memory.
Storage location: Logs need a shaded, moderately humid environment during colonization. In Colorado, this means:
Positioning options:
Moisture is the variable you’ll manage most actively, and in Colorado it matters more than almost anywhere else in the country. Colorado averages 14–17 inches of precipitation per year in the Front Range (Longmont sits right in this range), compared to 40–50 inches in the mushroom-rich forests of the Pacific Northwest or Appalachia. That means your logs won’t stay moist on their own.
Rule of thumb: If you haven’t had meaningful rain in the past 7–10 days, water your logs.
How to water:
How to tell if a log needs water: Lift it. A well-hydrated log feels significantly heavier than a dry one. If a log you’ve been growing for 6 months feels as light as the day you inoculated it, it needs water.
During Colorado summers: Plan to water logs weekly from mid-June through August. During the dry spring months (March–May), every 10–14 days is usually sufficient if you’re getting some rain.
Good news: you don’t need to do much. Mushroom mycelium is extremely cold-tolerant, and Colorado winters — even at higher elevations — won’t kill well-established mycelium in your logs. Below approximately 40°F, mycelium enters a slow dormancy. It resumes active growth when temperatures consistently warm above 50°F in spring.
What you can do during winter:
Don’t be alarmed if you see no visible mycelium activity over winter. The log is doing exactly what it should: resting.
Colonization is slow and largely invisible for the first several months. Here’s what success looks like over time:
Shiitake: The most responsive species to force-fruiting. Soak the log in cold water — 50–60°F — for 12–24 hours. Submerge it completely and weigh it down with a rock or board. After soaking, remove the log, stand it upright in your fruiting location (a shaded spot with good air circulation), and expect pins within 3–7 days. This cold shock triggers the mushroom’s fruiting response, mimicking a heavy rain event followed by cooler temperatures. See our full Shiitake cultivation guide for detailed harvest guidance.
Blue Oyster, Lion’s Mane, Reishi: These species generally fruit on their own seasonal schedule without requiring force-fruiting. Blue Oyster and Lion’s Mane tend to fruit in response to the natural temperature drops of fall and, to a lesser extent, spring. Reishi fruits reliably in summer. Providing consistent moisture is the main lever you have — a well-hydrated log is a log that’s ready to fruit when conditions are right.
General timing: Most species fruit most reliably in spring (April–June) and fall (September–October) in Colorado — the two seasons when temperature swings and moisture are most favorable. Logs may also produce smaller summer flushes after heavy rain events.
One of the most common questions we get at Foxfire: “How many logs can I inoculate with one bag?” Here’s the breakdown.
| Log Diameter | Log Length | Approximate Plugs Needed |
|---|---|---|
| 3–4″ | 3 ft | 25–35 |
| 3–4″ | 4 ft | 30–45 |
| 5–6″ | 3 ft | 40–55 |
| 5–6″ | 4 ft | 55–75 |
A standard 100-count plug spawn bag from Foxfire covers approximately:
If you’re new to log inoculation, we recommend starting with two or three logs of the same species using one bag. That gives you enough to work with without overcommitting, and you’ll have a clear point of comparison when your logs start fruiting on different schedules.
Every species moves at its own pace. Reishi growers need patience; Blue Oyster growers are often surprised by how quickly things happen. Here’s what to expect from each species we carry at Foxfire.
| Species | Expected First Flush | Annual Flushes | Log Lifespan |
|---|---|---|---|
| Shiitake | 12–18 months | 2–4 | 4–7 years |
| Blue Oyster | 6–12 months | 2–3 | 3–5 years |
| Lion’s Mane | 6–12 months | 2–3 | 3–5 years |
| Reishi | 18–24 months | 1–2 | 4–6 years |
| Chicken of the Woods* | 12–24 months | 1–2 | 3–5 years |
| Turkey Tail | 6–12 months | Multiple small | 4–6 years |
Chicken of the Woods — important note: Always cook Chicken of the Woods thoroughly before eating. Unlike most gourmet mushrooms, Chicken of the Woods can cause sensitivity reactions in some individuals, particularly when consumed raw or undercooked. We recommend trying a small amount the first time, especially if you have tree nut or shellfish sensitivities. See our full Chicken of the Woods cultivation guide for species-specific growing details and preparation guidance.
For deep dives into specific species, see our guides on Lion’s Mane, Reishi, and our gourmet mushroom species guide covering the full range.
Timing your inoculation to Colorado’s seasonal rhythms makes a real difference — both for spawn establishment and for making the most of your first fruiting windows.
Primary Inoculation Window: Late February through April
This is the sweet spot for Colorado Front Range growers. The soil temperatures are climbing, nighttime freezes are becoming rare by mid-March at lower elevations, and the mycelium you establish now will have the entire spring and summer to colonize before winter. Logs inoculated in late February through April typically show their first fruiting bodies the following spring or fall.
Secondary Inoculation Window: September
Fall inoculation works. Mycelium establishes more slowly through winter — it colonizes at a reduced pace rather than dormancy — and tends to burst with activity in the following spring. Fall inoculations often produce their first fruiting bodies 18–24 months after inoculation but can deliver excellent yields once they get going.
Avoid: Summer Inoculation (June–August)
Colorado’s summer heat and dryness creates a tough environment for newly inoculated logs. High temperatures (90°F+ in Longmont and across the Front Range) combined with low humidity mean logs dry out rapidly and competing organisms are at their most aggressive. If you inoculate in summer, you’ll spend significantly more effort keeping logs moist and shaded, and establishment rates are lower. Wait for fall if you’ve missed the spring window.
Log inoculation is one of the most rewarding projects you can take on as a home grower — low input, long payoff, and genuinely impressive results when that first flush appears. At Foxfire Mushrooms in Longmont, Colorado, we’ve designed our plug spawn program to make it as simple as possible to get started.
We carry six plug spawn species in 100-count bags:
Not sure which species to start with? Our plug spawn buying guide walks through each species’ difficulty level, flavor profile, and ideal growing conditions to help you choose.
Every order from Foxfire Mushrooms comes with our 30-day money-back guarantee — if your plug spawn arrives in anything less than perfect condition, we’ll make it right. We’re a small Colorado company, and your success as a grower is what keeps us going.
Questions? Reach us at foxfiremushrooms.com — we’re always happy to talk through your setup.
Use a 5/16″ drill bit — this is the industry standard for plug spawn and creates a tight, secure fit for the dowel. A 1/4″ bit will be too narrow (plugs won’t seat without splitting the wood around the hole), and a 3/8″ bit will be too wide (plugs will rattle loose and leave gaps). If you’re buying a bit specifically for this purpose, get a brad point or auger-style 5/16″ bit for cleaner holes in hardwood.
Not if you’re starting with colonized grain spawn or a grow kit. A pressure cooker (15 PSI capable) is only needed if you want to sterilize your own grain bags — an intermediate-to-advanced technique. For your first several grows, Foxfire’s ready-to-use colonized grain bags or grow kits eliminate this requirement entirely.
A 100-count bag covers roughly 2–3 standard 4-foot logs at 3–4″ diameter, using the diamond-pattern hole spacing we recommend (rows 6″ apart, holes 2″ apart within each row). Larger logs at 5–6″ diameter will use 55–75 plugs per log, so a single bag may cover only 1–2 larger logs. We recommend buying at least one bag per log if you’re uncertain, and using any extra plugs to add additional coverage — more inoculation points mean faster, more even colonization.
Technically yes — but we strongly recommend against it. Wax seals serve two functions: they block competing organisms from entering through the plug holes, and they reduce moisture loss from the inoculation points. In Colorado’s dry climate, unsealed plug holes dry out faster than in more humid regions, and that dry zone is exactly where you need mycelium to be establishing. Cheese wax is inexpensive and the application takes only seconds per plug. It’s not worth skipping.
True contamination in log cultivation is less common than in indoor bag growing, but it does happen. Warning signs include: green mold (Trichoderma) growing from plug holes or log ends, which indicates unsealed holes or logs that were too old when inoculated; slimy bacterial growth at plug holes, which can indicate logs that were too wet or damaged at inoculation; or no mycelial growth at log ends after 18+ months in a log that’s been kept consistently moist. Some green surface mold on bark between plug holes is not necessarily contamination — it’s normal surface mold that your mycelium will typically outcompete as it colonizes deeper wood.
No. Tap water, well water, and collected rainwater are all fine for soaking logs. Unlike grain spawn or liquid culture work, there’s no need to use distilled or filtered water. Municipal tap water with standard chlorine levels doesn’t negatively affect mycelium in log substrates — the wood itself buffers the contact significantly. If you’re using heavily chlorinated water and notice slow colonization, you can let water sit in an open container for 30 minutes before use to off-gas chlorine, but this is a minor optimization rather than a necessity.
primary window is late February through April** on the Colorado Front Range (Longmont, Boulder, Fort Collins, Denver metro). This gives mycelium the full spring growing season to establish before summer heat arrives. A secondary window in September also works well — colonization is slower through winter but the mycelium is established and ready to explode in spring. Avoid inoculating in summer (June–August) if possible; Colorado’s heat and low humidity make moisture management much harder and contamination rates are higher.
No — and this is a hard rule. All of the species we carry at Foxfire are white-rot fungi that colonize hardwoods: deciduous trees like oak, maple, alder, cherry, and cottonwood. Conifers (pine, spruce, fir, juniper, cedar) contain resins and terpenes that are actively inhibitory to white-rot fungi. Inoculating conifer logs with any of our plug spawn species will result in failed colonization at best, and wasted spawn at worst. If you have abundant juniper or pine in your yard (common on the Colorado Front Range), seek out a local arborist who can provide fresh-cut hardwood — cottonwood and box elder are common in riparian areas throughout the Front Range and make acceptable logs for Oyster and Reishi.
Share this article
Grab a beginner-friendly kit and apply what you just read —
or take the quiz and we’ll match you to the right
starting point.
