

- Scott Brenton
- 5 min read
The honest framing We grow mushrooms indoors for a living and we do not sell anything foraged. So this page has no commercial interest in
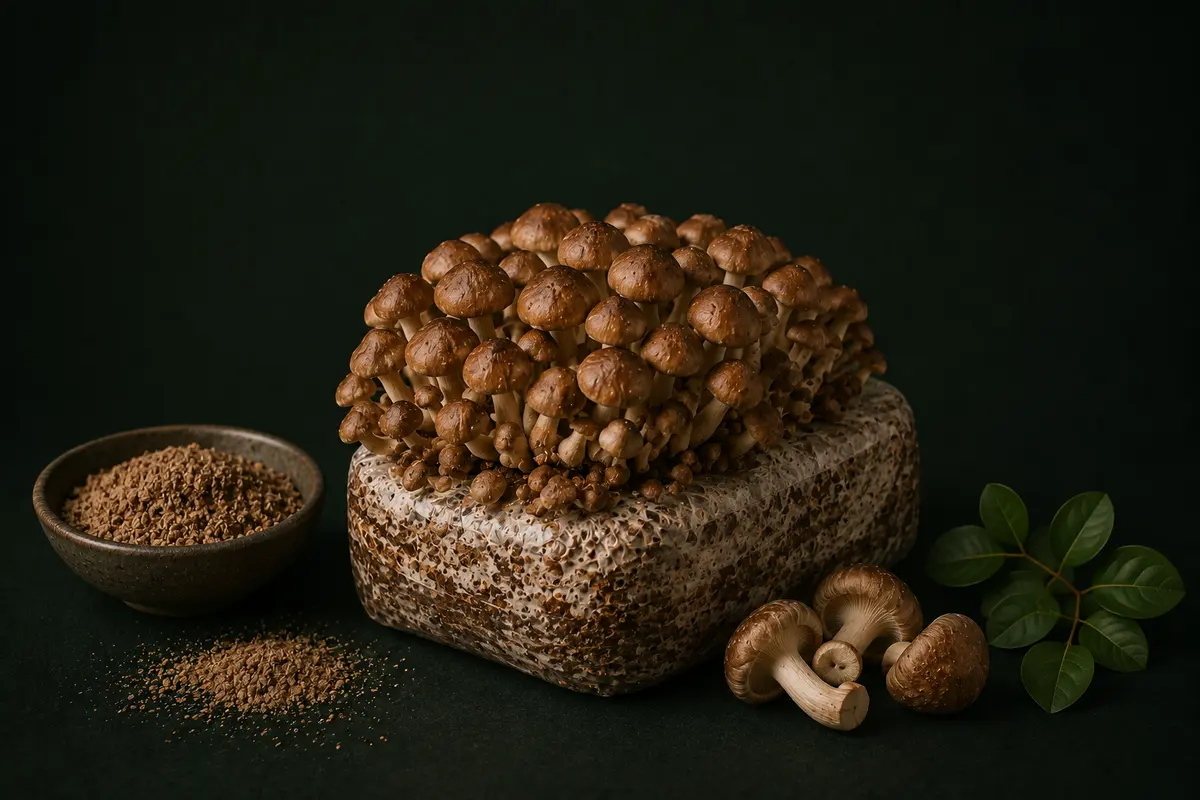
A fresh cluster of chestnut mushrooms pulled from a colonized block at Foxfire Mushrooms Longmont lab looks nothing like the mushrooms most beginners picture. Instead of the wide, fan shaped caps that oyster mushrooms throw, tight knots of small tan caps form together like a bouquet, each one firm and faintly nutty when broken open, the kind of texture that makes a grower stop and turn the cluster over in their hands before it ever reaches a pan.
That texture is the real answer behind growing chestnut mushrooms at home: with the right hardwood substrate, cool fruiting temperatures, and patience through a slower colonization stretch, chestnut mushrooms are manageable for a home grower, even a first timer, though they demand more attention than the oyster strains most beginners start with.
Quick Facts — Species: Pholiota adiposa – Ideal fruiting temperature: 55-65°F – Time to first pins: 7-14 days – Time to full first flush: 14-21 days – Substrate: hardwood sawdust or supplemented block – Flushes per block: 2-3
Chestnut mushrooms, sold under the scientific name Pholiota adiposa, grow in dense, tightly packed clusters rather than the loose shelves typical of blue or pink oyster strains. The caps stay small, usually an inch or two across, and the texture holds up better in a saute pan because the flesh is firmer and holds less water than most oysters, which is also why chestnut mushrooms tend to sear rather than steam in a hot pan. The flavor is where the name comes from, a genuinely nutty, almost roasted quality that comes through even in a simple butter and garlic saute.
The tradeoff is speed. Chestnut mycelium colonizes slower than oyster strains because Pholiota species metabolize hardwood lignin at a more gradual pace, and the mushroom fruits best at cooler temperatures, closer to a basement than a warm closet. A grower moving from oysters to chestnuts should expect slower visible progress and a cycle that rewards patience over daily checking.
There are two entry points. The first is a precolonized grow kit, where the substrate has already been fully colonized in a lab and shipped ready to fruit. Foxfire’s ready made kit works this way, colonized and quality checked in the Longmont lab before it ships, and the only real requirement on the grower’s end is a spot with steady indirect light and air in that 55 to 65 degree range. The second entry point is starting from grain spawn and building a bulk substrate from scratch, which costs less per pound of mushrooms produced but adds several steps and a real risk of contamination in a workspace that is not clean.
Either route calls for a way to hold humidity around 90 to 95 percent while the block is pinning, plus a thermometer and hygrometer to catch a temperature swing before it stalls the pins.
Preparing a bulk batch starts with supplemented hardwood sawdust, meaning sawdust mixed with a nitrogen source like wheat bran or soy hull at roughly a 10 to 20 percent ratio by weight. This mix needs to be sterilized rather than pasteurized, since the added nutrition makes it more hospitable to contaminants too.
Once packed into heat resistant bags, it goes through a pressure cooker or autoclave, cools completely, and is inoculated with grain spawn at a generous rate, closer to one part spawn for every four or five parts substrate. That higher ratio matters more with chestnuts than faster colonizing species, since a stronger head start shortens the window where contaminants could take hold first.
Colonization for chestnuts runs three to four weeks at room temperature, noticeably longer than the ten days to two weeks typical of a fast oyster strain. The block should turn solid white and firm, with no visible substrate showing through by the end. Green, black, or pink patches usually signal contamination rather than a normal stage of colonization, while a small amount of yellow liquid on the surface is a normal metabolic byproduct and not a concern on its own.
Getting chestnuts to fruit comes down to timing three conditions at once: a temperature drop into that 55 to 65 degree range, high humidity, and some fresh air exchange to start pinning. Home growers moving from oyster strains often run a fan constantly out of habit, but chestnuts respond better to a lighter touch, largely because the species pins in response to a mild buildup of carbon dioxide rather than a strong drop in it.
Too much fresh air during fruiting tends to produce long, thin stems with small, sparse caps, since the mushroom stretches toward the airflow instead of clustering. Allowing carbon dioxide to build slightly, with only a few minutes of fanning once or twice a day, produces the tight, dense clusters chestnuts are known for. Side by side blocks fruited in the same room at Foxfire’s lab demonstrated this directly: the block opened less often for airflow consistently formed denser, more compact clusters than the one exposed to frequent fanning.
Chestnut mushrooms are harvested as whole clusters, twisted or cut free at the base before the caps flatten and the edges curl upward. Waiting too long leads to a tougher texture and a shorter shelf life once picked. After harvest, the block rests a few days without misting the cut surface directly, then returns to normal humidity and airflow. A second flush typically appears within 10 to 14 days, usually smaller than the first, and a third flush is possible but often not substantial enough to be worth the extra wait.
| Factor | Precolonized Grow Kit | Bulk Substrate From Spawn |
| Upfront cost | Higher per kit | Lower per pound of yield |
| Contamination risk | Very low, already colonized | Moderate, depends on sterile technique |
| Time to first flush | 1 to 3 weeks | 5 to 7 weeks total |
| Equipment needed | Humidity tent or bag, thermometer | Pressure cooker, bags, spawn, tent |
| Best for | First time growers, small spaces | Growers scaling up or supplying a kitchen |
For a first attempt at chestnuts specifically, starting with a kit removes the one variable most likely to fail, which is substrate sterility, since lab colonized blocks are tested for contamination before they ship. Once a full cycle has been observed start to finish, moving to bulk substrate and grain spawn becomes a much more practical next step.
The most common issue is green mold, usually Trichoderma, which appears when substrate was not fully sterilized or a bag was opened in a dusty room during inoculation. There is no fixing a contaminated block once mold takes hold, only prevention on the next batch. The second common issue is pins that stall or die off, almost always a temperature problem rather than a humidity one, since chestnuts are noticeably fussier about staying cool than most oyster strains.
A recorded case from Foxfire’s Longmont lab showed pinning stall for nearly a week longer than expected when the fruiting tent ran a few degrees above the 55 to 65 degree target, a margin oyster strains tolerate without issue. Moving the block to a cooler section of the room brought pinning back within two days, a clear reminder of how narrow the temperature window is for this species and why a reliable thermometer matters more for chestnuts than for almost any other beginner mushroom.
Chestnut mushrooms are not the easiest first species to grow, and a total beginner is usually better served starting with a blue oyster kit before attempting chestnuts. Still, chestnuts remain within reach for a first time grower, and there is a particular satisfaction in watching that first tight cluster of caps push through the substrate after weeks of waiting. Holding a room in that 55 to 65 degree band and resisting the urge to run a fan constantly lets a precolonized kit handle most of the difficulty, and the payoff, a dense, nutty cluster rarely found fresh at a grocery store, is worth the wait.
For anyone with a cool corner of a basement, garage, or spare room, that space likely already holds a fruiting temperature suited to chestnuts. Foxfire’s chestnut kit ships fully colonized with a live arrival guarantee, so the substrate preparation and sterilization risk are already handled before the box arrives, and any order over $75 ships free, a threshold most growers reach once a second kit or a bag of supplemented substrate is added for a bulk attempt later.
For a restaurant or market considering chestnut mushrooms for a menu or produce stand, Foxfire’s wholesale program and grower consultations are worth reviewing before committing to a larger setup.
From inoculation on bulk substrate, expect roughly five to seven weeks total. A precolonized kit skips most of the colonization wait and can fruit within one to three weeks of arrival.
Yes, as long as high humidity is maintained another way, such as misting inside a large clear tote with air holes. What matters is holding 90 to 95 percent humidity during pinning, not the container used.
Chestnut mushrooms carry a nutty, faintly roasted flavor with a firmer, meatier texture than oyster mushrooms and hold their shape well in sautes and soups.
This is usually a temperature or humidity swing rather than disease. Chestnuts are more sensitive to warm spikes than many oyster strains, so the fruiting space should stay within the 55 to 65 degree range.
Sometimes, though it is usually small and slower to appear than the second flush. Many growers compost the substrate after two flushes rather than wait on a third that may never fully form.
Supplemented hardwood sawdust, sometimes called a master’s mix when combined with soy hull pellets, produces the most reliable results.
No, they are unrelated. Water chestnuts are an aquatic vegetable, while chestnut mushrooms belong to the Pholiota family, a true fungus related to other wood loving mushrooms.
Share this article
The honest framing We grow mushrooms indoors for a living and we do not sell anything foraged. So this page has no commercial interest in

The farm tour Forty-five minutes, walking the whole cycle in the order it happens: substrate mixing, the sterilisation and inoculation side, the dark incubation room,

Why this county is unusual Boulder County has an established open-space and agricultural-land programme, a population that will pay a premium for provenance, a dense
Grab a beginner-friendly kit and apply what you just read —
or start with our beginner’s guide to find the right first grow.